
Master the Classic French Braid — Simple Step-by-Step Guide for Beginners
The French braid is a timeless three-strand style that builds by adding small amounts of hair into each outer strand, creating a secure, salon-quality look that stays put through your day—perfect for work, school, or events. This beginner-friendly tutorial walks you through prepping the hair, the add-and-cross mechanics, keeping even tension, and finishing like a pro so you can braid confidently on yourself or someone else. Most people struggle with slipping sections, uneven tension, or bulky transitions; we break the process into tiny, repeatable actions and practical fixes to help you improve quickly. You’ll also get product and tool suggestions, quick variations for different lengths, troubleshooting tips, and clear cues for when a stylist at Kylie Studio Salon in Bethesda, MD can step in to polish the look. Read on for the essentials, a numbered how‑to built for featured snippets, an easy variation comparison, common mistakes with fixes, and local booking guidance.
Tools & Products You’ll Need for a French Braid
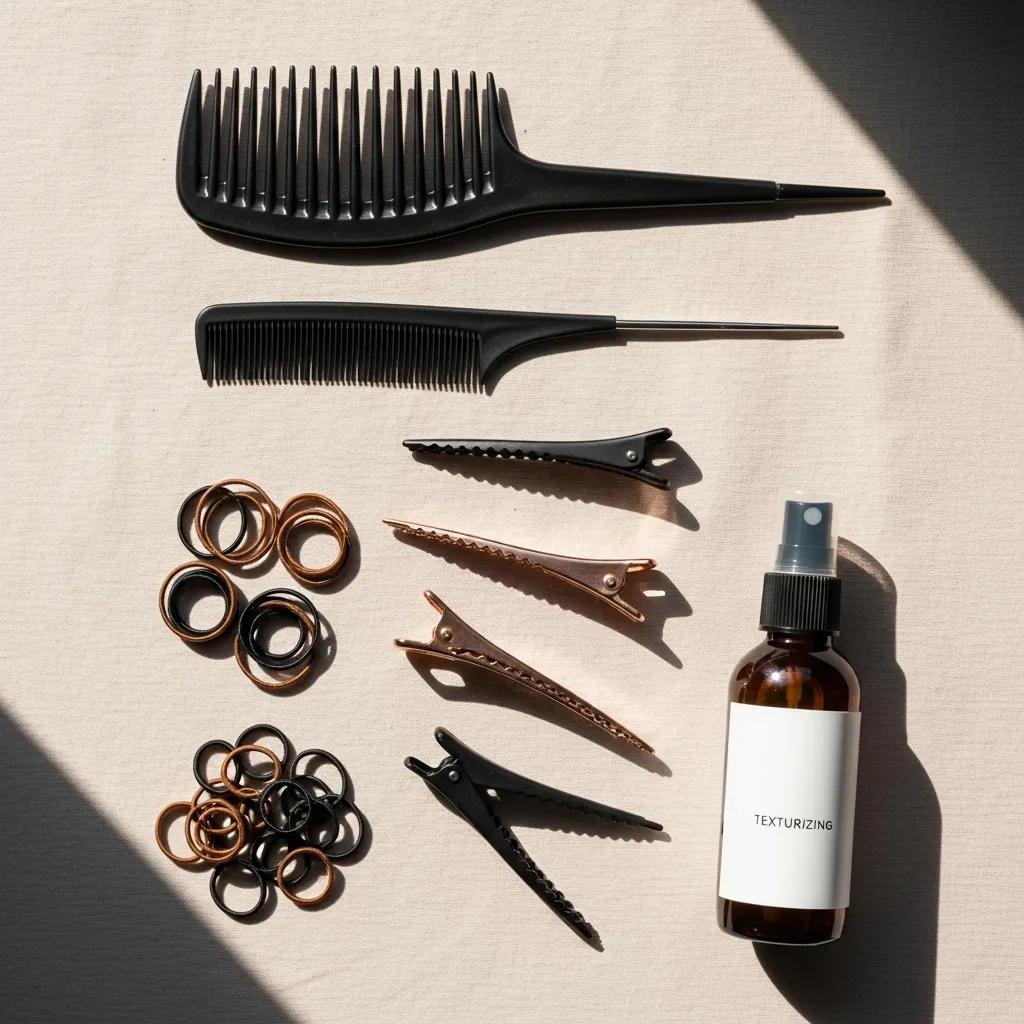
A neat French braid starts with the right tools and light products: things that add grip, tame frizz, and let you section cleanly. Detangle first with a wide‑tooth comb or brush, refine parts with a fine‑tooth comb, and use clips and elastics to hold your progress. A texturizing spray or dry shampoo gives slip‑resistant grip, while a lightweight finishing mist holds flyaways without stiffness. The right combination reduces slippage and makes tension easier to control—professionals often pair simple brushes with salon‑grade texturizers for long‑wearing braids.
Essential tools and when to use them:
- Wide-tooth comb or brush: Removes knots on wet or dry hair gently and preps hair for smooth sectioning.
- Fine-tooth comb: Creates crisp partings and helps you take small, consistent additions while braiding.
- Claw clip or sectioning clips: Keeps unbraided hair tucked away and maintains clean separation between panels.
- Small clear elastics: Secure the braid end cleanly without distracting from the style.
- Texturizing spray or dry shampoo: Adds grip to freshly washed or slippery hair so sections hold better.
- Lightweight hairspray or finishing mist: Smooths flyaways and sets the braid without making it crunchy.
These basics will get you ready for the step‑by‑step technique below—sectioning and tension rely on the same tools you see here.
This table shows when a simple at‑home tool is enough and when a salon‑grade option can improve control and finish. Next, we’ll walk through the exact technique step by step so you can braid confidently.
Which Essential Hair Tools Help You Braid Cleanly?
Good tools give you control over sectioning, tension, and finish—without them braids slip or look uneven. A wide‑tooth comb detangles gently and keeps hair healthy, while a fine‑tooth comb helps you take smaller, consistent additions for a uniform braid. Sectioning clips are indispensable for longer hair or for styles like double braids because they keep unworked sections secure. Household substitutes are fine for practice—just focus on consistent section size and a snag‑free elastic to finish neatly. The right kit reduces frustration so your technique can shine.
Which Products Help You Achieve a Neat French Braid?
Products don’t replace technique, but they make tension easier to hold and lengthen wear. Texturizing spray or a light dry shampoo adds grip to slick hair so each added piece stays put. A small amount of smoothing serum on the ends reduces bulk and frizz where sections overlap, and a flexible hairspray sets the style without freezing movement. Salon‑grade texturizers and finishing sprays often give more predictable hold and sheen—great when prepping for photos or events. Use products sparingly for a natural, moveable finish.
How to Perform the Classic French Braid Technique
The classic French braid weaves three main strands and progressively adds small pieces of hair into each outer strand as you cross, creating a secure, integrated braid along the scalp. The secret is consistent, small additions and steady finger tension so each cross sits flush without gaps, producing the smooth continuous pattern the style is known for. Practice the sequence slowly—divide, cross, add, repeat—to build muscle memory and speed while keeping the braid neat and durable.
Follow these numbered steps for a beginner-friendly build of a classic French braid:
- Prep and section (2–4 minutes): Brush or comb hair smooth, apply a light texturizing spray if hair is slippery, then take a triangular top section from the hairline to the crown and split it into three equal strands.
- Start basic crossings (1–2 minutes): Cross the right outer strand over the middle, then the left outer strand over the new middle—do two basic crossovers to anchor the pattern.
- Add hair progressively (4–8 minutes): Before each crossover, pick up a small amount of hair from the side you’re adding from and incorporate it into the outer strand, then cross over. Keep additions small to keep tension even.
- Maintain tension and hand position (ongoing): Use your thumbs and index fingers to pinch additions and pull taut as you cross; consistent pressure prevents loops and gaps.
- Finish and secure (1 minute): Once you reach the nape, continue with a standard three‑strand braid to the ends and secure with a small elastic; mist lightly with a flexible hairspray for hold.
Practice these steps slowly at first—calm, consistent motions beat rushing every time.
Take tiny additions and keep your hands close to the scalp—control at the root is what turns a good braid into a great one.
Step-by-Step French Braid Instructions for Beginners
This section breaks the numbered steps into small, repeatable actions so beginners can focus on one dependable motion at a time. Start by dividing your top section into three equal strands and hold them taut with your non‑dominant hand to stabilize the base. When you pick up a new piece, slide it into the outer strand with your thumb and index finger and immediately tighten before crossing—this locks the addition in place. Work in calm, uniform increments and pause after each addition to check alignment. Practicing these micro‑steps helps build finger memory so the whole process becomes fluid.
How to Keep Tension and Neatness Consistent
Even tension and a tidy finish come from a steady grip and small, repeatable adjustments—not from forceful pulls. Position your fingers about an inch from the scalp to control the root and use a thumb‑index pinch for each addition. If a section loosens, stop and tighten that single cross by pulling gently on the strands above it instead of redoing the entire braid. Light product—texturizer at the roots for grip and a smoothing serum for flyaways—supports tension without stiffness. Once you learn these tactile cues, switching to side braids or double braids becomes much easier.
Common French Braid Variations and How to Create Them

Variations change the start point, symmetry, or how much hair you add while using the same add‑and‑cross mechanics. Side French braids, double braids, and half‑up braids are all built from the classic technique—each simply adjusts the initial sectioning or how far you add hair. Choose by hair length, desired volume, and occasion; knowing the small tweaks for each variation helps you pick the right look for your hair and event.
Quick variation cues:
- Side French Braid: Start at a side part and angle additions diagonally to sweep the braid across the head—great for soft, face‑framing looks.
- Double French Braids: Part down the center and braid each half for two symmetrical braids—perfect for active days and a balanced silhouette.
- Half-Up French Braid: Braid the crown and secure midway to combine textured detail with loose lengths for an easy, versatile style.
This comparison helps you match a variation to your time and skill—next we’ll cover specific cues to make each variation work on different hair lengths.
How to Make Side, Double, and Half-Up French Braids
Each variation changes the start point and sectioning while keeping the add‑and‑cross method. For a side braid, take a larger triangular section on one side and keep additions small as you sweep across—finish lower at the nape for a relaxed feel. For double braids, create a clean center part and braid one side at a time, matching section sizes so both braids mirror each other. For a half‑up braid, limit additions to the crown and secure with an elastic or pin, leaving the rest loose to soften the look. These small adjustments keep the French braid’s structure while creating distinct silhouettes.
Adjustments for Different Hair Lengths
Length affects section size, weight management, and finish. On short hair, take very small additions and use texturizer for grip so strands don’t slip—tiny sections prevent airy gaps. Medium hair benefits from slightly larger additions and a light serum on ends to reduce bulk. For long hair, add less near the nape to manage weight, or twist the braid and tie a smaller elastic to reduce pull; a finishing spray helps the shape hold. If you want extra volume for an event, a stylist can blend in extensions seamlessly.
Troubleshooting: Fix Common French Braid Mistakes
Most beginner problems have simple causes and fixes—uneven tension usually comes from inconsistent section sizes, while slippage often means hair is too slick or additions are too large. Diagnose quickly by checking section size, finger position, and adding a touch of texturizer before reworking stubborn areas. The table below lists common problems, likely causes, and quick fixes you can do at home or when to ask a salon for help.
Use this table to decide whether a quick at‑home fix will do or if a professional touch is worth it for long‑lasting, event‑ready polish. Below we explain frequent mistakes and how to extend braid longevity.
Frequent Beginner Errors and How to Avoid Them
Beginner mistakes usually fall into three areas: uneven tension, taking chunks that are too large, and losing section control. Even tension creates the braid’s visual rhythm—use the same thumb‑index pinch and pull each time you add hair. Avoid large pieces; smaller additions give smoother transitions and less bulk. Keep unbraided hair clipped away and check symmetry periodically with a mirror or by feeling for bumps. These habits prevent common errors and make fixes easier when they come up.
How to Make Your French Braid Last Longer
A French braid can last several days with the right prep and care: start with products that add grip and light hold, protect hair while you sleep, and do small touch‑ups as needed. Sleep on a silk or satin pillowcase or wrap hair in a soft scarf to reduce friction. For touch‑ups, gently tighten loose crosses and reapply a small amount of finishing spray—avoid overworking the braid to preserve shape. For multi‑day travel or important events, consider a salon appointment so a stylist can set the braid with salon‑grade products and secure finishes that hold longer.
When to Book a Professional French Braid at Kylie Studio Salon
We recommend booking a professional braid when you want a long‑lasting finish, a complex variation, or an event‑ready style that needs precise hold and symmetry. Stylists use salon‑grade products, precise tools, and finishing techniques that are hard to replicate at home. Kylie Studio Salon in Bethesda, MD offers personalized braiding by Ruth and the team—perfect for weddings, photos, or any day you want a reliable, polished braid. Below are the main reasons to consider a pro appointment.
Reasons to book a professional braid:
- Event durability: Stylists use targeted products and pinning to keep styles intact through movement and weather.
- Complex variations: Intricate or bridal designs need precise symmetry and faster execution by a trained stylist.
- Time savings and confidence: A stylist delivers a polished finish quickly so you can focus on the rest of your event prep.
These benefits make professional braiding a smart choice when you need a flawless, long‑lasting result; the next section covers local advantages and booking tips.
Benefits of Professional Braiding Services in Bethesda, MD
Local professional braiding gives a consistent finish, access to salon‑grade products, and hands‑on expertise that accounts for Bethesda’s seasonal climate. Stylists like Ruth tailor sectioning and product use to your hair texture and event conditions, creating styles that resist humidity and stay neat all day. Beyond durability, a professional stylist customizes braid size, placement, and finish so your look matches your outfit and the occasion. Clients who need reliable, photo‑ready results often prefer a salon appointment for peace of mind and expert execution.
How to Schedule an Appointment with Ruth
Booking at Kylie Studio Salon is simple: request a braiding or styling appointment and share the look you want, the event type, and any time constraints so we can recommend the right service and prep. Consider adding a blowout before braiding for smoother texture and longer hold, or book a trial run ahead of a major event to confirm length and volume. Ruth, the salon’s owner and stylist, offers personalized advice on product choices and protective strategies for longer wear. Use the salon’s online booking tools or contact the studio directly to arrange a consultation.
If you’re practicing at home, these professional options give a clear path for elevating your braid when longevity, complexity, or event demands exceed DIY comfort.
Quick Practice List:
- Practice consistent, small additions on a mannequin or a friend for 10 minutes each day.
- Repeat the thumb‑index pinch motion until it feels reflexive.
- Time yourself doing the full braid once a week to track progress and speed improvements.
Together, these tables and drills give a compact framework and practice plan to improve your technique.
Troubleshooting checklist:
- If sections slip: add a bit of texturizer and re‑tighten the affected crosses.
- If the braid looks uneven: reduce your addition size and re‑balance symmetry from the crown.
- If frizz appears: smooth ends with a serum and set with a flexible hairspray.
Keep this checklist handy during practice or right before an event to ensure a clean, lasting braid.
When to choose Kylie Studio Salon:
- When you need event‑ready durability and a polished finish.
- When you want complex variations or multi‑braid looks that require speed and symmetry.
- For a professional consultation on product selection and protective styling.
These cues help you blend at‑home practice with professional support so you can move from beginner to confident braider.
Frequently Asked Questions
What’s the best way to practice French braiding at home?
Start with a mannequin or a friend’s hair and do short, focused practice sessions—10 minutes a day is great. Concentrate on consistent, small additions and the thumb‑index pinch. Do a full braid once a week to measure progress and speed, and use a mirror to check symmetry and tension as you go. Regular repetition builds muscle memory quickly.
Can I French braid my hair if it’s very short?
Yes—short hair can be braided with a few adjustments. Take very small additions to keep strands secure and use a texturizing spray for extra grip. If a full braid isn’t possible, try a half‑up French braid or add extensions for length and volume. These options let you get the look even on shorter hair.
How can I keep my French braid from falling apart during the day?
Begin with clean, dry hair and a light texturizing spray to add grip. Secure the finished braid with a snag‑free elastic and mist it with a flexible hairspray to control flyaways. For long days or active plans, a professional styling service can add extra hold and pinning so the braid stays put.
What should I do if my French braid looks uneven?
First check your section sizes—uneven additions cause imbalance. Gently tighten any loose crosses by pulling the strands above them instead of redoing the whole braid. Use a mirror to check symmetry and make small adjustments as you go. With practice, consistent section sizes will become second nature.
Are some hair types better for French braids?
French braids work on most hair types. Slightly textured or wavy hair tends to hold tension better, while very straight, fine hair may need a texturizer to prevent slipping. Curly hair can be braided neatly but may require extra smoothing. With the right technique and products, anyone can create a tidy French braid.
How do I choose the right variation for my event?
Pick a variation based on hair length, the formality of the event, and your personal style. Side or half‑up braids suit casual or romantic looks; double braids or intricate styles work well for active days or formal occasions. If you’re unsure, consult a stylist for a recommendation that complements your outfit and event.
What common mistakes should I avoid when learning?
Watch for three common pitfalls: taking additions that are too large, inconsistent tension, and losing section control. Focus on small, equal sections and repeat the thumb‑index pinch to keep tension steady. Check your braid in a mirror regularly to catch issues early. Practice will make these habits automatic.
Conclusion
Learning the classic French braid gives you a versatile, polished hairstyle you can rely on for everyday wear or special occasions. With the right tools, a few useful products, and focused practice, you can get professional‑looking results at home—or turn to Kylie Studio Salon for expert help when you need extra durability or a special finish. Start practicing, be patient with yourself, and consider a stylist consult when you want the look dialed in for an event. Your braid game starts now—have fun with it.


