Master the Perfect Blowout with a Round Brush: Your Go‑To Guide for Salon‑Quality, Voluminous Hair
A blowout turns damp hair into smooth, full-bodied style using heat, tension, and focused airflow. The round brush is the tool that sculpts lift, shape, and shine. In this guide we’ll show how a blowout works, which round brushes and sizes give the most lift, step‑by‑step techniques to get salon results at home, and which products protect hair while keeping bounce longer. If you struggle with frizz, flat roots, or styles that fall flat after a few hours, understanding barrel size, bristle type, dryer settings, and product layering will fix those problems. We’ll walk you from the mechanics of the round brush to choosing the right tools, practicing the technique, layering pre‑styling and finishing products, and maintaining your look between salon visits — with tips for fine, thick, and layered hair plus practical comparison charts to help you decide.
What Is a Blowout and How Does a Round Brush Enhance It?
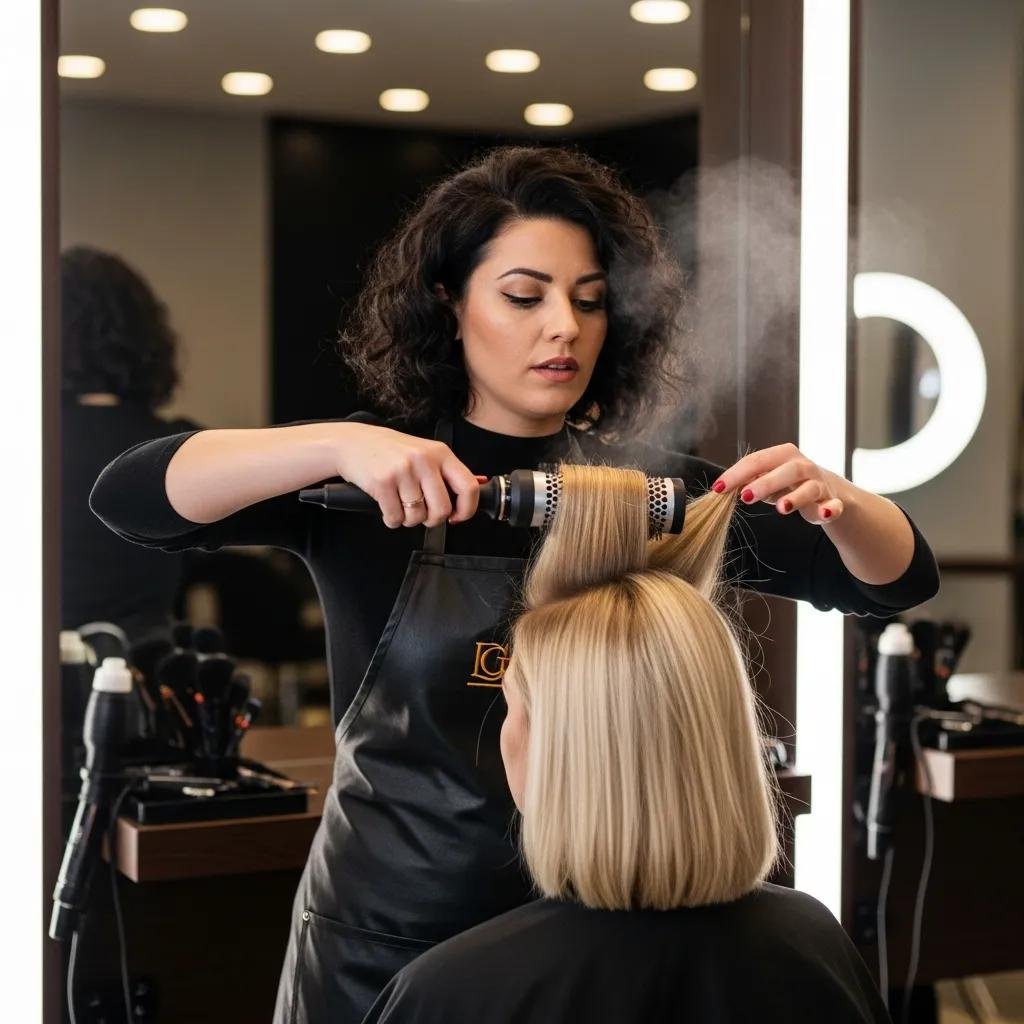
A blowout is a styling method that uses heat, tension, and controlled airflow to shape hair into a smooth, voluminous look and temporarily smooth the cuticle for shine. Wrapping hair around a round brush adds mechanical tension while the bristles guide airflow and flatten cuticle scales, which creates root lift and polished lengths. That mix of heat and tension is what gives round‑brush blowouts both volume and natural movement — perfect for a bouncy, salon finish. Knowing how the brush works also makes it easier to pick the right barrel size and bristle type for the shape you want.
What Are the Benefits of a Professional Blowout?
A professional blowout gives immediate volume, tames frizz, and leaves a polished finish that often outlasts DIY attempts. Stylists adjust heat, sectioning, and product use to your hair type, so the style holds better between washes and saves you time each morning. Pros also protect hair by layering heat protectants and using appropriate dryer settings, so the result looks glossy and resists flyaways. That’s why many people book blowouts before events or for busy weeks — professional technique delivers reliable, long‑lasting polish.
How Does a Round Brush Create Volume and Smoothness?
The round brush builds volume by combining barrel tension with directed airflow to lift roots and shape the hair, while bristle choice helps smooth the cuticle for shine. Bigger barrels create broader waves and more overall lift; medium barrels give bouncy movement; and smaller barrels produce tighter curves and concentrated root lift — so barrel diameter directly affects curl size and perceived volume. Bristle types also matter: boar bristles polish and distribute natural oils for shine; mixed boar/nylon gives extra grip plus smoothness; and vented or ceramic barrels speed drying and hold heat for a faster set. Knowing these differences makes it easy to match a brush to the look you want.
Which Round Brush Is Best for Achieving Maximum Hair Volume?
The right round brush for maximum volume depends on barrel size, material, and bristle firmness compared to your hair length and texture. Match barrel diameter to length and bristle density to thickness. For targeted root lift on medium to long hair, a medium‑to‑large ceramic or ionic barrel with firm but flexible bristles holds heat and grip for lasting lift. Finer hair does better with smaller diameters and softer bristles to avoid overstretching while still creating bounce. Use the table below to compare brush types and expected results before we cover retail and in‑salon considerations.
Intro to brush comparison table: Quick reference to common round brush types, suggested barrel sizes, and how they affect volume and smoothness.
Summary: Match barrel diameter to hair length — larger for longer hair, smaller for shorter hair — then pick material and bristle density based on whether you want speed, smoothing, or root lift. Next we’ll break down brush types and sizes in more detail and give a simple checklist to choose the right one.
What Are the Different Types and Sizes of Round Brushes?
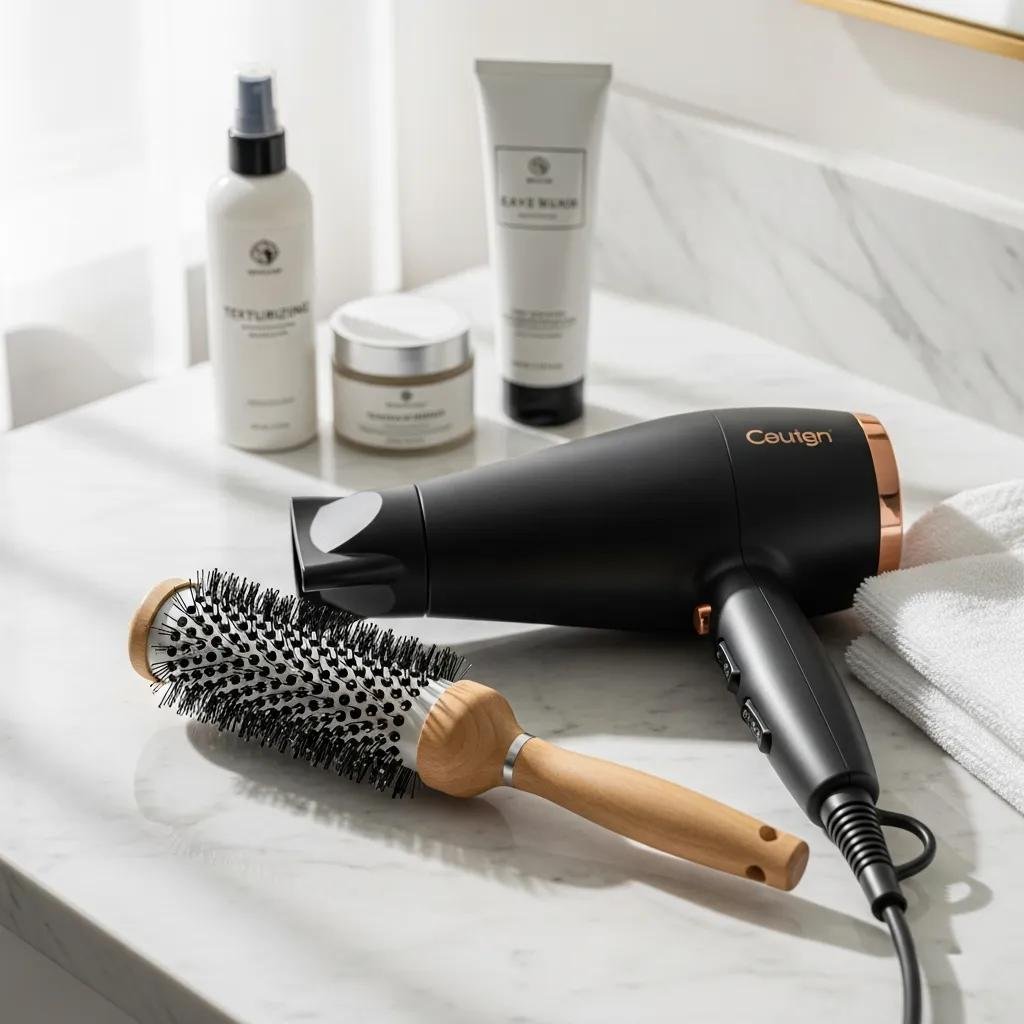
Round brushes come in ceramic, ionic, boar‑bristle, vented, and mixed‑bristle styles. Each affects drying speed, heat distribution, and the finished polish. Ceramic and ionic barrels retain and distribute heat evenly for faster shaping and longer‑lasting volume; boar bristles smooth the cuticle and boost shine by spreading natural oils; vented barrels speed evaporation and cut blow‑dry time, which helps with thick or layered hair. Barrel sizes usually span from about 20 mm (for tight curves and root lift) up to 50 mm (for broad waves and volume). Picking the right size is key to getting the bounce or smoothness you want.
How to Choose the Right Round Brush for Your Hair Type and Length?
Use these simple rules: short hair — small barrels (20–30 mm); medium hair — medium barrels (30–40 mm); long hair — larger barrels (40–50 mm) for broad volume. Consider bristle density: fine hair benefits from softer, lower‑density bristles so you don’t tug; thick hair needs firmer or mixed bristles for grip and control. For layered or textured cuts, section carefully and try a vented or mixed‑bristle brush to move quickly through layers without overheating the ends. These guidelines set you up to use the brush effectively in the technique section below.
How Can You Master Blowout Techniques for a Salon‑Quality Finish at Home?
Getting a salon‑quality blowout at home takes a consistent routine: prep with heat protectant and a volumizer, pre‑dry to the damp stage, section hair, use steady barrel‑to‑root tension with the round brush, and finish with a cool‑shot to lock the shape. The short how‑to below is a quick checklist you can follow each time, then we’ll expand on each step and common mistakes to avoid.
Step‑by‑step summary (HowTo):
- Apply heat protectant and a root volumizer to towel‑dried hair.
- Pre‑dry hair until 70–80% dry on medium heat using a concentrator nozzle.
- Section hair into manageable panels and work from the lower layers upward.
- Use a round brush sized for your hair, rolling hair away from the face while directing dryer airflow down the shaft.
- Finish each section with a cool‑shot and a light, flexible‑hold spray to set the shape.
This sequence is the reliable flow — below is a compact table linking each step to tools, common mistakes, and a pro tip to keep you on track.
Intro to technique EAV table: A quick reference matching steps to tools, mistakes to avoid, and pro tips.
Summary: Follow a repeatable sequence — prep, pre‑dry, section, tension + heat, cool‑shot — and use the table above as your quick checklist. With those basics set, the next sections go deeper into each move and how to fix common issues.
What Are the Step‑by‑Step Blow Dry Techniques Using a Round Brush?
Start with heat protectant on towel‑dried hair, concentrating on mid‑lengths and ends to guard the cuticle. Pre‑dry to about 70–80% with a concentrator nozzle on medium heat; stopping at this damp stage gives the round brush enough moisture to shape hair without puffing. Work in horizontal panels from nape to crown and clip the top layers out of the way. Take one‑ to two‑inch subsections, place the brush at the root, lift while following the brush with the dryer’s airflow down the shaft, then roll the brush to the ends and hold briefly before a cool‑shot to set the shape. These steps lead into common troubleshooting for a frizz‑free finish.
How to Avoid Common Blowout Mistakes for Frizz‑Free, Bouncy Hair?
Typical mistakes include over‑drying, using the wrong barrel size, aiming air against the cuticle, and using too much product. Fixes are straightforward: stop pre‑drying at the damp stage, match barrel to length, direct airflow downward to smooth the cuticle, and choose lightweight volumizers plus flexible‑hold finishing sprays.
- Over‑drying → Stop at 70–80% dry → Keeps enough moisture for the brush to set shape without puffing.
- Wrong barrel size → Choose barrel by length (small for short, large for long) → Gives the curl/volume you want.
- Excess product → Use lightweight mousse and flexible spray sparingly → Preserves movement and avoids weighed‑down roots.
Summary: Most styling issues come down to timing, the right tool, and measured product use. Apply these fixes to keep bounce and minimize frizz, then move on to product choices that extend your blowout.
What Products Support a Long‑Lasting, Voluminous Blowout?
A long‑lasting blowout comes from a simple product order: pre‑styling heat protectants and root‑lift mousses on damp hair, then flexible finishing sprays, shine serums, or texture sprays to maintain movement and control. Pre‑styling products build a foundation that fights humidity and helps hair hold shape during drying; finishing products lock structure while keeping hair touchable. The table below outlines product types, when to apply them, and examples of salon vs. at‑home options.
Intro to product EAV table: Clear roles for pre‑styling versus finishing products and when to use each for best durability.
Summary: Layer products in this order — protectant, volumizer, then finishing spray/shine — to preserve bounce and avoid buildup. Next we’ll outline specific pre‑styling and finishing product picks and how to apply them.
Which Pre‑Styling Products Protect and Add Volume?
Pre‑styling products should protect from heat and add structure where you need it most — usually at the root and mid‑lengths. Heat protectants reduce cuticle damage when sprayed onto towel‑damp hair, while mousses or root lifters add internal structure the round brush can shape. Work a pea‑sized amount of volumizing mousse through mid‑lengths and use a targeted root spray at the scalp, then distribute evenly during the pre‑dry phase so you get hold without heaviness. Salon retail often carries professional‑grade options with stronger humidity resistance.
What Finishing Products Enhance Shine and Hold?
Finishing products should balance hold and movement. Flexible‑hold hairsprays keep shape without stiffness; light shine serums add gloss to lengths and ends without weighing down roots. For second‑day body, a touch of dry shampoo or a texturizing spray at the roots and mid‑lengths restores lift and soaks up oil. Spray finishing product from arm’s length for even coverage, and use a tiny drop of serum only on the ends. These finishing steps keep your blowout looking fresh and touchable while preserving volume.
How Do You Maintain and Refresh Your Blowout Between Salon Visits?
Keeping a blowout looking great between salon visits comes down to sleep habits, product choices, and quick touch‑ups with a smaller round brush and focused airflow. A silk pillowcase or a loose topknot reduces friction and protects root lift. Dry shampoo at the roots refreshes volume and stretches time between washes. For a fast reshape, spot‑dry areas with a small round brush and medium heat, finish with a cool‑shot and flexible spray. These simple habits cut down on salon visits and keep your style salon‑fresh longer.
Intro list of maintenance tips: Easy actions to help preserve shape and volume at home.
- Sleep on a silk pillowcase: Cuts friction and helps keep cuticles smooth.
- Use dry shampoo at roots: Absorbs oil and brings back lift without washing.
- Loosely pin hair: A gentle topknot or clip preserves shape overnight.
Summary: Combine low‑friction sleep routines, targeted dry shampooing, and quick brush‑and‑dry touch‑ups to extend your blowout. The next subsection gives a fast micro‑routine for quick refreshes.
What Are the Best Tips to Extend Blowout Longevity?
Extend your blowout by keeping oils off the roots, protecting hair overnight, and using lightweight maintenance products that restore volume without buildup. Start the day with dry shampoo at the roots and gently distribute it with a wide‑tooth comb rather than heavy brushing. Sleep on silk or loosely secure hair in a high, relaxed bun to prevent flattening. Avoid heavy oils near the scalp — reserve serums for ends only. These small habits add up and keep your volume and shine longer.
How to Perform Quick Touch‑Ups Using a Round Brush?
A quick touch‑up is three to five focused steps: mist roots lightly with water or a root‑refresh spray if needed, section a small area that needs lift, use a small round brush with medium heat to rebuild tension at the root, then finish with a cool‑shot and a light spritz of flexible‑hold spray. Work in one‑ to two‑inch sections so you don’t disturb the rest of the style, and direct airflow downward over the cuticle to prevent frizz. This micro‑routine usually takes three to five minutes per side and restores bounce without a full re‑blow‑dry.
Why Choose Kylie Studio Salon and Stylist Ruth for Your Perfect Blowout in Bethesda, MD?
Kylie Studio Salon delivers personalized blowouts that create confident, wearable results. Ruth — our owner and lead stylist — keeps up with current trends and techniques to tailor each service to your lifestyle and hair condition. We focus on thoughtful consultation, precise sectioning, and product choices that protect hair while producing long‑lasting lift and shine. Kylie Studio offers blowouts and women’s haircuts with blow‑dry services, convenient online booking, and retail picks you can take home. If you want a reliable blowout that prioritizes style and hair health, we’re here for you in Bethesda and the surrounding area.
Introductory list of what to expect from a salon blowout at Kylie Studio Salon:
- Personalized consultation to define your ideal volume and shape.
- Professional tool and product selection to match your hair and protect the cuticle.
- Stylist‑guided finishing and retail recommendations so you can recreate the look at home.
Summary: Our focus on personalized service, professional product selection, and modern technique supports a long‑lasting, voluminous blowout. Below we share what makes Ruth’s work stand out and how client feedback reflects our quality.
What Makes Ruth’s Blowout Expertise Unique?
Ruth is the salon owner and stylist with over 11 years of experience who stays current with glamorous trends and modern technique. She personalizes each blowout to flatter your features and fit your routine, using precise sectioning, tailored product layering, and controlled heat to deliver consistent root lift and smoothness while minimizing stress on the hair. Ruth works across modern shapes — from sleek, glassy finishes to full, 90s‑inspired volume — so clients leave with a look that feels both fashionable and wearable.
How Do Client Testimonials Reflect Our Blowout Quality?
Client reviews highlight lasting volume, polished finishes, and Ruth’s ability to translate a client’s vision into an effortless, wearable style. Many clients note that pro product choices and in‑salon technique keep their blowouts looking better and longer than at‑home attempts, which is why people book for special events or weekly maintenance. We encourage readers to consider these trends when deciding on a professional blowout and to ask about retail products that support long‑term hair health.
Kylie Studio Salon is located at 4711 Montgomery Ln, Suite 2, Bethesda, MD 20814 and serves Bethesda and surrounding areas; for appointments or questions about blowout services, call 301-922-7864 or ask for Ruth when booking. Our core value props are clear: expert hair services that build confidence, personalized attention from an experienced stylist, a commitment to enhancing your natural beauty, and easy online booking. These details make it simple to take the next step toward a salon‑quality blowout tailored to your hair and goals.
Frequently Asked Questions
What is the ideal frequency for getting a professional blowout?
How often you get a professional blowout depends on your hair type and lifestyle. Many clients book every 1–2 weeks to keep volume and shape. Fine hair may need touch‑ups more often; thicker hair can hold longer. Special events or busy weeks are common reasons to schedule more frequently. Always consider your hair’s health and the products being used so your hair stays strong between appointments.
Can I achieve a salon‑quality blowout with a regular hairdryer?
Yes — a regular hairdryer can deliver a salon‑quality blowout when paired with a concentrator nozzle, the right round brush, and proper technique. The concentrator helps you direct airflow precisely. While professional dryers may have advanced features like ionic technology and finer heat control, a standard dryer still works well with the right tools and method.
How do I choose the right heat protectant for my hair type?
Pick a heat protectant based on your hair type and styling routine. Fine hair benefits from lightweight sprays that won’t weigh hair down. Medium to thick hair can use cream‑based protectants for extra moisture and protection. If you use high heat often, choose a protectant with conditioning properties. Always apply evenly to towel‑damp hair before styling for best protection.
What should I do if my blowout starts to lose volume?
If your blowout loses volume, try dry shampoo at the roots to absorb oil and restore lift. Quick touch‑ups with a small round brush and a dryer can rebuild root volume. Avoid heavy products that weigh hair down, and use a light spritz of flexible‑hold hairspray only where needed to maintain shape without stiffness.
Are there specific products to avoid for maintaining a blowout?
Yes. Avoid heavy oils and thick creams near the roots — they can flatten volume. Steer clear of dense gels or heavy mousses that create stiffness. Choose lightweight volumizers and flexible‑hold sprays instead. Also limit products with high alcohol content, which can dry hair and increase frizz.
How can I refresh my blowout without re‑styling it completely?
To refresh without a full re‑style, lightly mist your roots with water or a root‑refresh spray, section small areas, and use a small round brush with a hairdryer on medium heat to reintroduce lift. Finish with a cool‑shot to set the shape and a touch of flexible‑hold hairspray. This quick routine takes just a few minutes and restores volume and shape.
Conclusion
Salon‑quality blowouts are within reach once you learn the right techniques and pick the correct tools and products. Knowing how round brushes create volume and smoothness helps you recreate professional results while protecting hair health. If you prefer a personalized, pro finish, book a blowout at Kylie Studio Salon — we’re ready to help you elevate your hair.


