Dutch Braid vs. French Braid — How to Choose and Braid with Confidence
Braids are a timeless style that blend technique, protection, and visual impact. Choosing between a Dutch braid and a French braid begins with the simple mechanics behind each method. This guide breaks both styles down in clear, practical terms: what makes a French braid an overhand braid and a Dutch braid an underhand (inverted) braid, how each technique changes volume and hold, and which textures and occasions suit each look. You’ll find beginner-friendly drills, quick visual cues to tell the two apart, and notes on when to bring your request to a pro in Bethesda. Throughout, expect step-by-step tips, short lists for quick reference, and comparison tables to help you pick and create the braid that fits your needs.
What Is a French Braid? Definition and Classic Characteristics
A French braid is a three-strand braid that adds sections of hair as you work down the scalp, using an overhand crossing motion that keeps the plait flat and close to the head. That inward, over-the-top action creates a smooth cascade from the crown and helps control flyaways for a neat, everyday finish. Mechanically, the technique distributes tension evenly across sections, which keeps the style tidy without tugging at the roots. Once you’ve mastered the basics, the French braid is easy to adapt into crowns, braided ponytails, and other variations — and it helps you choose the right finishing products for hold and shine.
French braids offer a few dependable benefits:
- Flat, integrated look: Lies close to the scalp for a sleek silhouette.
- Highly versatile: Converts smoothly into updos, crowns, or ponytail finishes.
- Good control and hold: The overhand tension helps reduce surface frizz and keep hair secure.
These qualities make the French braid a go-to for casual days and formal events alike — and they set up the next section on how the overhand motion actually works.
How Does the Overhand Braiding Technique Define a French Braid?
The overhand method means each outer strand crosses over the center strand while you add small pieces of hair into that outer strand before the next cross. That crossing-over pulls hair inward so the braid sits flush against the scalp, creating a clean line from hairline to nape. Tension matters: even, moderate tension keeps the braid neat without causing discomfort or breakage. Working with slightly damp hair or light texture product can make braiding easier. Common beginner mistakes include pulling too tight at the crown or using uneven section sizes — both are fixed by starting with larger guideline sections and checking symmetry in a mirror.
What Are the Typical Appearances and Suitable Occasions for French Braids?
French braids suit a range of lengths and textures, and they’re easiest on medium to long hair where you can smoothly add sections. Classic looks include a single center braid for everyday wear, a braided crown for formal occasions, or double braids for active days. For finer hair, a looser tension plus a light texturizer can add perceived fullness; for thicker hair, start with smaller partitions to keep the braid even. Overall, French braids work well for school or work, weddings, and sports when you want a polished, contained style.
What Is a Dutch Braid? Understanding the Inverted Braid Technique
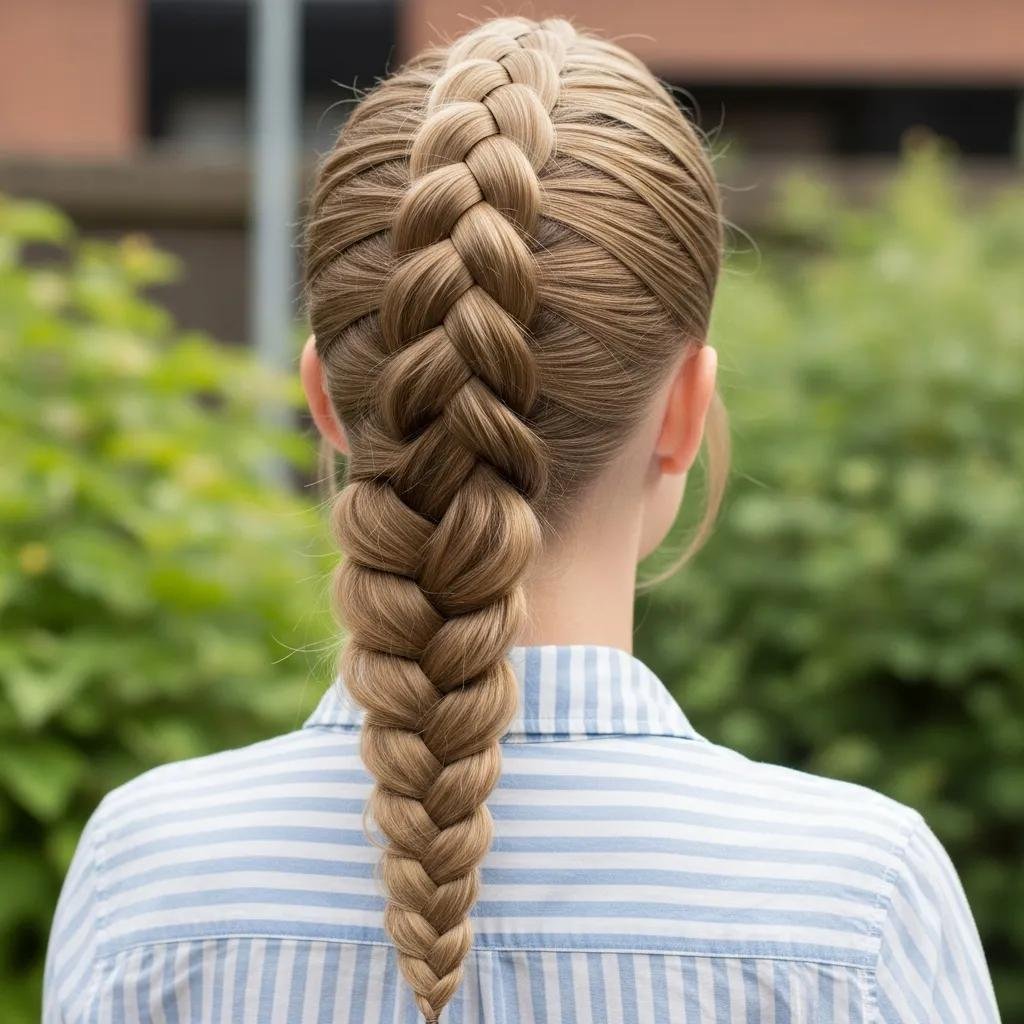
A Dutch braid — often called an inverted or inside-out braid — uses an underhand crossing technique that lifts the braid above the scalp, creating a pronounced, three-dimensional effect. With the underhand method, outer strands pass beneath the center strand while you add hair into each section, so the braid sits on top of the hair instead of blending into it. That raised profile gives more visible volume and sharper edges, making Dutch braids especially striking for fashion-forward looks and athletic styles where strong contours are desirable. Recognizing this inverted action explains why a Dutch braid often appears fuller and picks up light differently than a French braid.
Dutch braids are known for a few key traits:
- Raised, 3D profile: The braid sits above the scalp with defined edges.
- Noticeable volume: Underhand crossing accentuates thickness and shadow along the plait.
- Statement-making: Great for sporty, editorial, or bold everyday styles.
These features make Dutch braids a strong choice when you want the braid to read as a clear design element rather than a low-profile integration.
How Does the Underhand Braiding Technique Create the Dutch Braid’s 3D Effect?
The underhand pass lifts hair because each outer section moves beneath the center strand, effectively stacking the hair outward instead of tucking it in. That stacking raises the braid and forms visible ridges that catch light and add depth. To emphasize the 3D look, use consistent, slightly firmer tension and work with smaller subsections near the crown for finer detail; looser sections lower down soften the finish. Beginners should slow down the underhand motion at first and use a mirror to confirm each cross goes beneath the center strand so they don’t accidentally switch to an overhand French pattern.
Which Hair Types and Events Are Ideal for Dutch Braids?
Dutch braids are best on shoulder-length hair and longer, and they really pop on medium to thick textures where the raised contours are visible. Fine hair can benefit from texturizing spray or gentle backcombing at the root to help the braid stand out without adding damaging tension; very curly hair often needs light smoothing and careful section control to keep crossings even. Dutch braids suit athletic events, photoshoots that need strong lines, and casual outings where a bold braid complements the outfit. They also work softened into romantic updos or dressed up with accessories for formal settings.
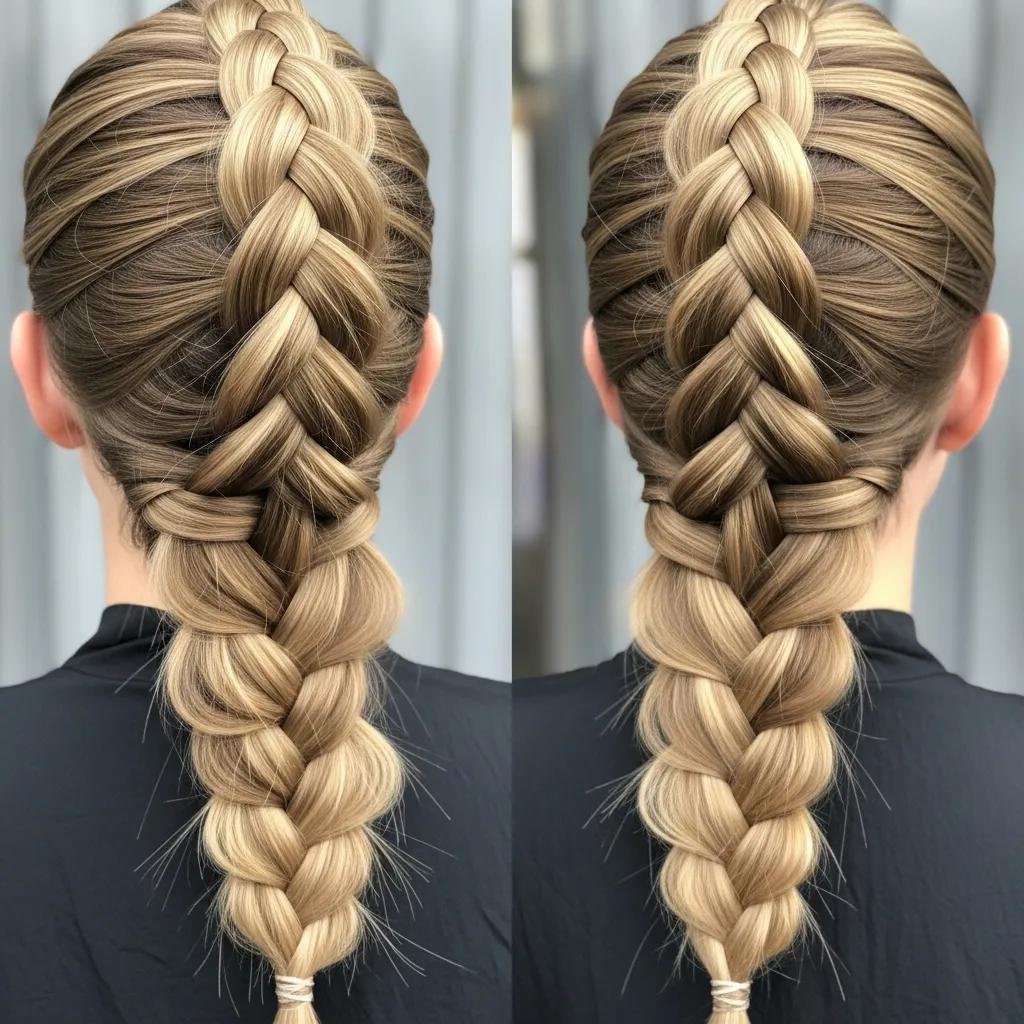
What Are the Key Differences Between Dutch and French Braids?
The main differences come down to crossing technique, finished look, and learning curve. French braids use an overhand motion, so the plait lies flat against the scalp; Dutch braids use an underhand motion, which raises the braid above the head. That simple mechanical change produces visual differences (flat versus lifted), variations in perceived volume and edge definition, and subtle effects on tension and wear. Knowing these contrasts helps you pick the braid that matches your aesthetic and daily needs, and it explains why some clients prefer professional styling for longer-lasting comfort and finish.
That table sums up the mechanical and visual trade-offs so you can match technique to your desired outcome. Next we’ll cover how those differences play out in real styling situations and why professional help can matter for durability and scalp comfort.
Kylie Studio Salon in Bethesda offers professional braiding with an emphasis on precise technique, controlled tension, and products that protect hair health. Our stylists start with a short consultation to choose the braid variation that best complements your face shape and lifestyle, then tailor tension and product choice to protect hair integrity. If you want a long-wearing, comfortable braid, a pro finish often makes the difference.
How Do Braiding Techniques Differ: Overhand vs. Underhand?
At the hands-on level, overhand braiding means passing the working strand over the center strand, which pulls hair inward and keeps the braid snug to the scalp. Underhand braiding passes the working strand beneath the center and builds outward volume. Practically, each French cross tightens the silhouette against the head, while each Dutch cross creates visible ridges. For DIYers, a quick test is to watch one outer strand during a cross: if it goes over, you’re doing a French braid; if it goes under, you’ve started a Dutch. Skill comes from steady rhythm and consistent section sizes.
How Do Appearance, Volume, and Difficulty Compare Between the Two Braids?
French braids read as a seamless continuation of the scalp, giving a flatter, understated look; Dutch braids read as bolder and more textured, with greater perceived volume. Many learners find the French braid easier because the overhand motion feels more natural, while the Dutch braid’s underhand motion can seem counterintuitive at first. Choose French for sleek, low-profile styles and Dutch when you want the braid to be a visual focal point. The practice tips below will help with either technique.
How to Tell a Dutch Braid from a French Braid: Visual and Technique Tips
Quick identification relies on a few reliable visual cues and a short checklist you can use while braiding or when viewing a finished style. The core method is to look at the braid’s edges: if the plait rises from the scalp, it’s Dutch; if it blends into the head, it’s French. Other clues include shadowing along the sides, how hair is added to each cross, and whether the braid’s ridge is sharp or subtle. These signals let stylists, photographers, and DIYers label a style at a glance and adjust technique as needed.
Top visual cues and why they matter:
- Raised edges: Dutch braids show distinct ridges along each side of the plait.
- Flat integration: French braids flow from the scalp with minimal edge definition.
- Shadowing: Stronger shadows and depth point to a Dutch braid’s 3D profile.
- Starting section look: French beginnings fold hair into the center; Dutch starts sit atop the hair.
- Light reflection: Dutch ridges catch highlights and make strands pop.
Use these checks to verify the method in photos, on clients, or while teaching someone to braid.
If hands-on help is what you want, Kylie Studio Salon offers in-salon consultations and demonstrations where a stylist will show the crossing technique, tension control, and finishing touches in person. Booking a demo is a great option if you prefer guided practice or need a durable style for an event.
What Visual Cues Help Identify Each Braid Style?
Visual cues focus on profile and edge detail. Dutch braids display a raised profile with clear ridges; French braids create a flatter silhouette that hugs the scalp. The crossing direction also changes how light and shadow fall across the braid — Dutch edges cast deeper shadows, producing more contrast in photos and real life. Look at the crown, too: a French braid’s added hair folds into the center, while a Dutch braid’s added hair layers above. Spotting these signs makes identification and coaching much easier.
Which Braiding Steps Highlight the Differences in Technique?
Here’s a short 5-step checklist to confirm the defining action while braiding:
- Section the hair into three even strands.
- Start the first cross and note its direction (over for French, under for Dutch).
- Add equal small sections to the outer strands before each cross.
- Keep tension steady—moderate for French, slightly firmer for Dutch.
- Secure and smooth with the right product for hold and finish.
Checking the crossing motion mid-braid lets you correct course early so the finished look is clearly French or Dutch.
Which Braid Style Is Easier for Beginners: French or Dutch?
Generally, the French braid is easier for beginners because the overhand motion feels more natural and the flat profile makes symmetry easier to judge. The inward pull of a French braid gives tactile cues that help with section control and tension. That said, beginners can learn the Dutch braid with structured practice that focuses on the underhand motion and even subsections — many people report the Dutch becomes intuitive after a few focused sessions. The key is progressive drills and realistic milestones that build muscle memory without stressing hair.
What Makes the French Braid More Beginner-Friendly?
French braids feel approachable because the overhand crossing mirrors familiar hand movements and produces a predictable inward motion. Start with larger sections to reduce fiddliness and then shrink subsections as control improves. Simple drills — practicing the crossing motion on three loose strands, then adding hair gradually — build confidence quickly. Typical errors like uneven section widths and inconsistent tension are corrected by focusing on even partitioning and steady rhythm.
How Can Beginners Master the Dutch Braid with Practice?
Mastering the Dutch braid takes focused practice on the underhand motion and a few targeted drills to build muscle memory and section control. Try these exercises on extensions or a mannequin: slow underhand three-strand crossings to emphasize the “under” pass, use pre-made partitions to standardize subsection sizes, and practice in front of a mirror to ensure each outer strand passes beneath the center. Start with looser tension, then tighten for final looks. If you get stuck, an in-person demo with a stylist can quickly correct hand position and spacing.
- Slow-motion underhand passes: Rehearse each cross deliberately on loose strands.
- Section-guided repetitions: Use guide partitions to keep subsection sizes consistent.
- Mirror verification sessions: Confirm each outer strand passes beneath the center.
After these drills, most people see steadier crossings and fewer accidental overhand passes, helping the Dutch braid form reliably.
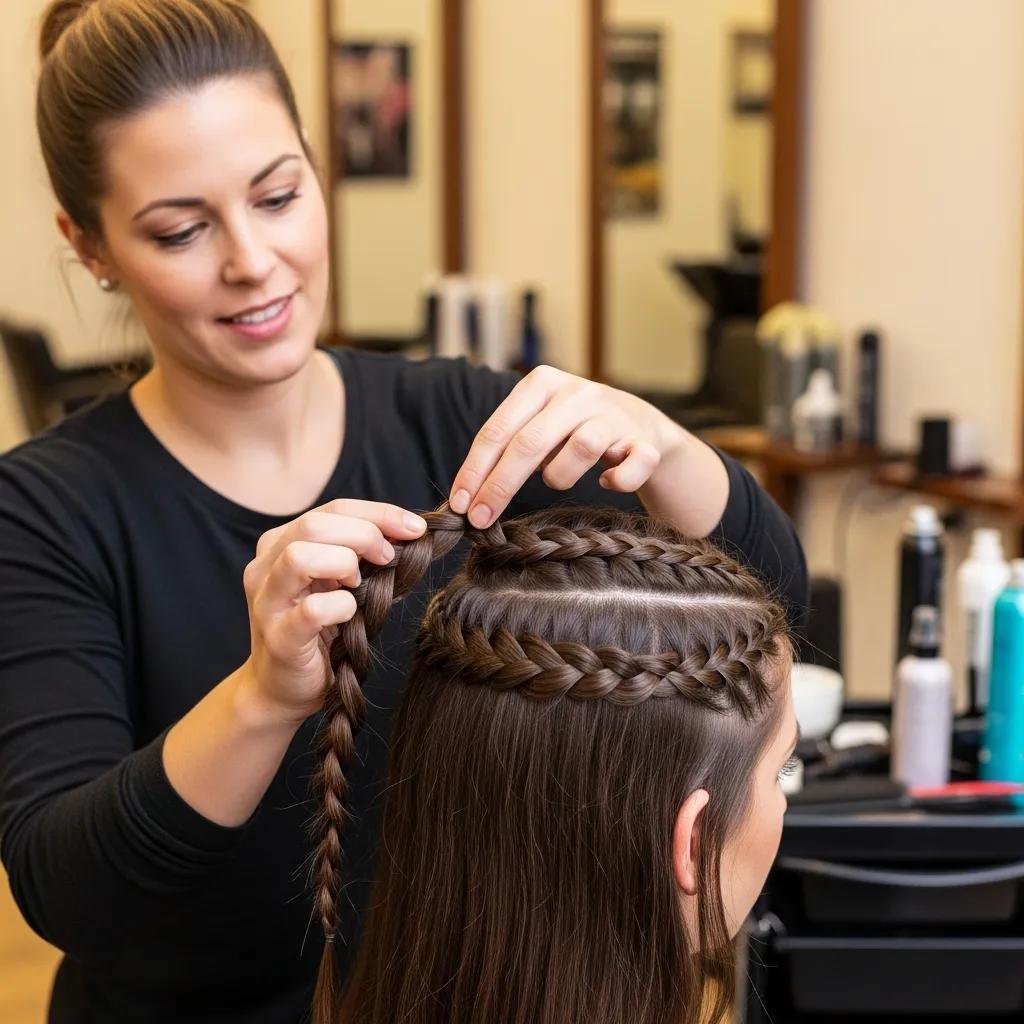
Why Choose Professional Braiding Services for Dutch and French Braids in Bethesda?
Working with a professional stylist gives you durability, scalp comfort, and a polished finish that’s hard to match when you’re still learning. Pros deliver consistent tension, refined sectioning, and finishing techniques that extend wear and reduce tension-related damage. A salon visit also saves time and leaves you with a style that’s ready for photos, long events, or active days. If you want instruction as well as a finished look, professionals can offer hands-on coaching tailored to your hair.
At Kylie Studio Salon in Bethesda, our braiding services are consultation-led: we assess hair density and texture, choose protective prepping techniques, and select products that balance hold with elasticity. Our stylists adjust tension and product use to preserve hair integrity, and they’ll share maintenance tips so your braid lasts comfortably. Ruth, one of our experienced braiders, focuses on balancing longevity with hair health, making professional braids a smart choice for weddings, photoshoots, or any day you want a reliable style without the learning curve.
How Does Kylie Studio Salon Ensure Expert Braiding and Hair Health?
We take a consultative approach: the stylist checks your hair condition, suggests gentle prepping (like smoothing and careful sectioning), and picks products that hold without making hair brittle. Our process emphasizes controlled tension to avoid root strain, finishing products that reduce friction, and practical aftercare advice to extend wear. Clients who want both instruction and execution can request a demonstration to learn the hand positions and sectioning strategies our stylists use.
What Are the Benefits of Personalized Braiding Styles at Kylie Studio Salon?
Personalized braiding tailors the look to face shape, hair density, and event needs so the finished style flatters and lasts. Examples include loosening or tightening braid tension for high-mobility situations, changing subsection width to balance thickness, or combining braids into an updo for formal wear. We also recommend home-care steps — gentle night wrapping or targeted leave-ins — to keep braids intact longer without stressing hair. For a one-on-one lesson or professional finish, our consultation model offers a practical path to reliable braids and better at-home technique.
Frequently Asked Questions
What are the main benefits of choosing a Dutch braid over a French braid?
A Dutch braid creates a bold, three-dimensional profile that really stands out — great for fashion-forward looks. Its underhand technique builds pronounced edges and added volume, which shows up best on medium to thick hair. Dutch braids also hold well for athletic activity and can be dressed up or down, so they’re versatile across occasions.
Can I create a Dutch braid on short hair?
Shorter hair makes a Dutch braid more challenging, but it can be done with adjustments. Texturizing spray adds grip and volume, and working with smaller sections helps control shorter strands. The raised profile may be subtler on very short hair, so results will vary by length and texture.
How can I maintain my braids for longer wear?
To keep braids fresh longer, use a light leave-in or braid spray to maintain moisture without weighing hair down. Avoid excess tension when styling, and wrap your hair at night with a silk or satin scarf to reduce friction and frizz. Gently re-tighten any loose sections as needed rather than forcing the whole braid tighter.
What tools or products are recommended for braiding?
Essential tools include hair ties, bobby pins, and a fine-tooth comb for clean parting. For products, reach for a light gel or mousse for hold without stiffness, a texturizer for grip, and a heat protectant if you’re using heat beforehand. For curly or textured hair, a smoothing serum helps control frizz and makes crossings cleaner.
Are there any specific techniques for beginners to improve their braiding skills?
Beginners should start with larger sections to simplify control, use a mirror to check progress, and practice the basic crossing motion on loose strands to build muscle memory. Tutorial videos, a braiding class, or an in-salon demo can also speed learning by showing hand placement and tension control in real time.
What should I consider when choosing between a Dutch and a French braid for an event?
Think about the look you want and how long you need it to last. French braids offer a sleeker, more understated finish that works well for formal events; Dutch braids give a bolder, textured statement that suits casual or fashion-forward settings. Also consider hair type and length — some styles hold better on certain textures — and your comfort with each technique.
Conclusion
Choosing between a Dutch braid and a French braid comes down to the look you want and how you’ll wear it. French braids give a smooth, close-to-the-head finish; Dutch braids create lift, edge, and volume. Knowing the technical difference — overhand versus underhand — helps you pick the right style and approach practice more effectively. If you’d like a pro finish or a hands-on lesson, book a consultation at Kylie Studio Salon and we’ll tailor a braid that fits your hair, your face, and your plans. Ready to try? Explore our services and let us help you find your best braid.


