Professional Hair Styling Tools Guide — Must-Have Gear for Every Look and Salon-Quality Results at Home
Practical, down-to-earth guidance on the tools that help you recreate salon finishes at home — from pin-straight sleek to full-bodied blowouts and effortless beach waves. This guide breaks down what each essential tool does, how materials and heat settings shape outcomes, and the pro techniques that keep styles lasting while protecting hair health. Kylie Studio Salon is your Bethesda resource for straightforward, actionable tips that support confident at-home styling without replacing professional care. Keep reading for curated tool lists, clear step-by-steps, brush picks, heat-protection rules, and quick advice on choosing tools for fine, thick, or curly hair.
What are the essential hair styling tools for creating every look?
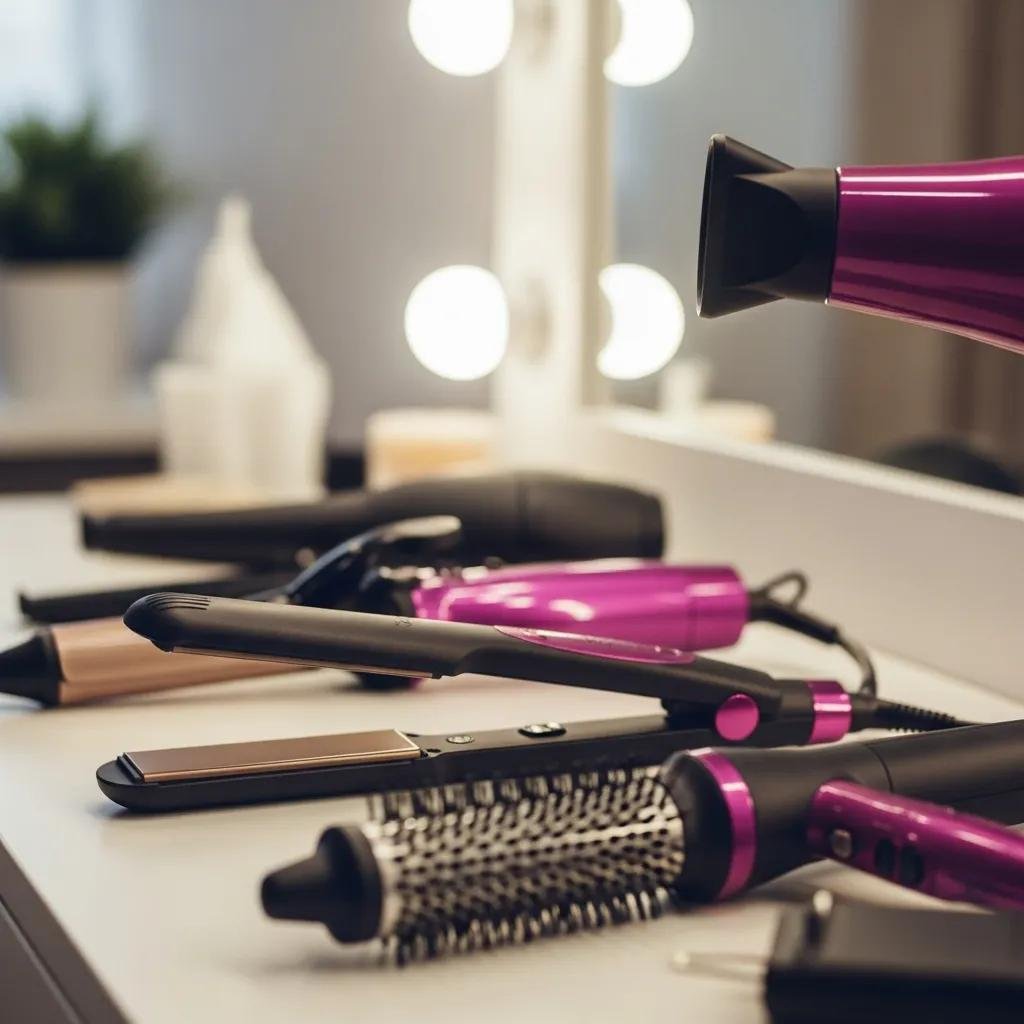
Every great style starts with the right toolkit. Each tool changes hair through heat, tension, or shaping, so owning the right pieces saves time and improves results — whether you want smooth, straight lengths or lifted, voluminous hair. Below are the core tools professionals recommend, with one-line uses so you can scan and shop with confidence.
The must-have tools for most styling kits include:
- Flat iron: Delivers sleek, straight finishes and controlled smoothing to tame frizz.
- Curling iron or wand: Shapes defined curls or relaxed waves depending on barrel size and technique.
- Hair dryer with concentrator and diffuser attachments: Speeds drying while shaping either volume or curl definition.
- Round brush (various sizes): Creates root lift and sculpts bend during a blowout.
- Paddle and detangling brushes: Smooth hair and remove knots with minimal breakage.
- Heat protectant spray: Forms a protective layer to reduce thermal damage and boost styling performance.
These basics cover most salon looks and will adapt to different textures when paired with appropriate heat settings and sectioning. The table below matches tool construction to performance so you can prioritize purchases.
Use this quick comparison to match tool materials and features to your needs. Next, we explain how plate and barrel choices affect straightening and curling, starting with flat irons.
Which tools create sleek, straight hair?
Flat irons smooth hair by applying controlled heat across clamped plates to realign the cuticle and remove curl memory. Ceramic plates heat evenly and are kinder to fine or fragile hair; titanium plates heat up faster and reach higher temps for dense or coarse textures. Tourmaline-treated surfaces add ionic benefits that help reduce frizz. For temperature, aim low for fine or fragile hair (250–320°F) and higher for thick or coarse hair (350–450°F). Start conservatively and raise heat only if needed. Work in narrow sections, glide the iron in steady, uninterrupted passes, and finish with a light serum to seal the cuticle and boost shine.
With those basics set, the next section covers how barrel size and clamp style shape curls and waves.
How do curling irons and wands craft long-lasting curls and waves?
Curling tools shape hair by wrapping it around a heated barrel — barrel diameter and clamp design determine curl size and character. Small barrels (¾”–1″) give tighter curls; 1″–1.5″ barrels create versatile, longer-lasting waves. Tapered wands help you get textured, lived-in waves by varying wrap direction. Use a clamp iron for even tension and a wand when you want a softer root-to-tip finish. Always let curls cool completely before brushing or spraying to set the shape. Prep with a light heat protectant and a styling mousse for better hold, then finish with a medium-hold spray to lock the look.
These curling principles work best when combined with the proper sequence and prep, covered in the next section.
How do you use professional styling tools for salon-quality results at home?
Pro results come from preparation, the right tool order, and thoughtful finishing products. Start with clean, towel-dried hair, apply an even layer of heat protectant, then choose tools based on your desired finish: dryers and round brushes for volume, flat irons for mirror-smooth shine, and wands for textured waves. The sequence — dry, shape, refine, finish — minimizes repeat high-heat passes and protects hair. Below are three clear step-by-step routines you can try at home.
Follow these step-by-step routines for consistent salon-style results:
- Blowout (Volume & Smoothness):
Towel-blot hair and apply heat protectant plus a root-lift spray to damp hair.Section into large panels; use a high-quality dryer with a concentrator and a medium round brush.Dry roots with focused airflow, then rotate the brush under each section to create tension and smoothness.Finish with a cool shot to set shape and a lightweight serum for shine. - Sleek Straight (Mirror Finish):
Fully dry hair on a low setting using a paddle brush to remove moisture.Work in micro-sections with a ceramic or titanium flat iron, making one steady pass per section.Keep temperature within the recommended range for your hair type and smooth ends with a touch of oil.Seal the style with a light flexible-hold spray to avoid stiffness. - Beach Waves (Textured Look):
Start with dry hair and a salt or texture spray for grip.Wrap alternating sections loosely around a 1″–1.25″ wand, leaving the ends out for a lived-in finish.Allow curls to cool, finger-comb to loosen, then mist with a texturizing spray for hold.Tweak any sections with the wand for balance and finish with a flexible-hold spray.
These routines prioritize single-pass heating and good prep to protect hair. If you’d like hands-on guidance, book a blowout or styling session to learn techniques directly from one of our stylists.
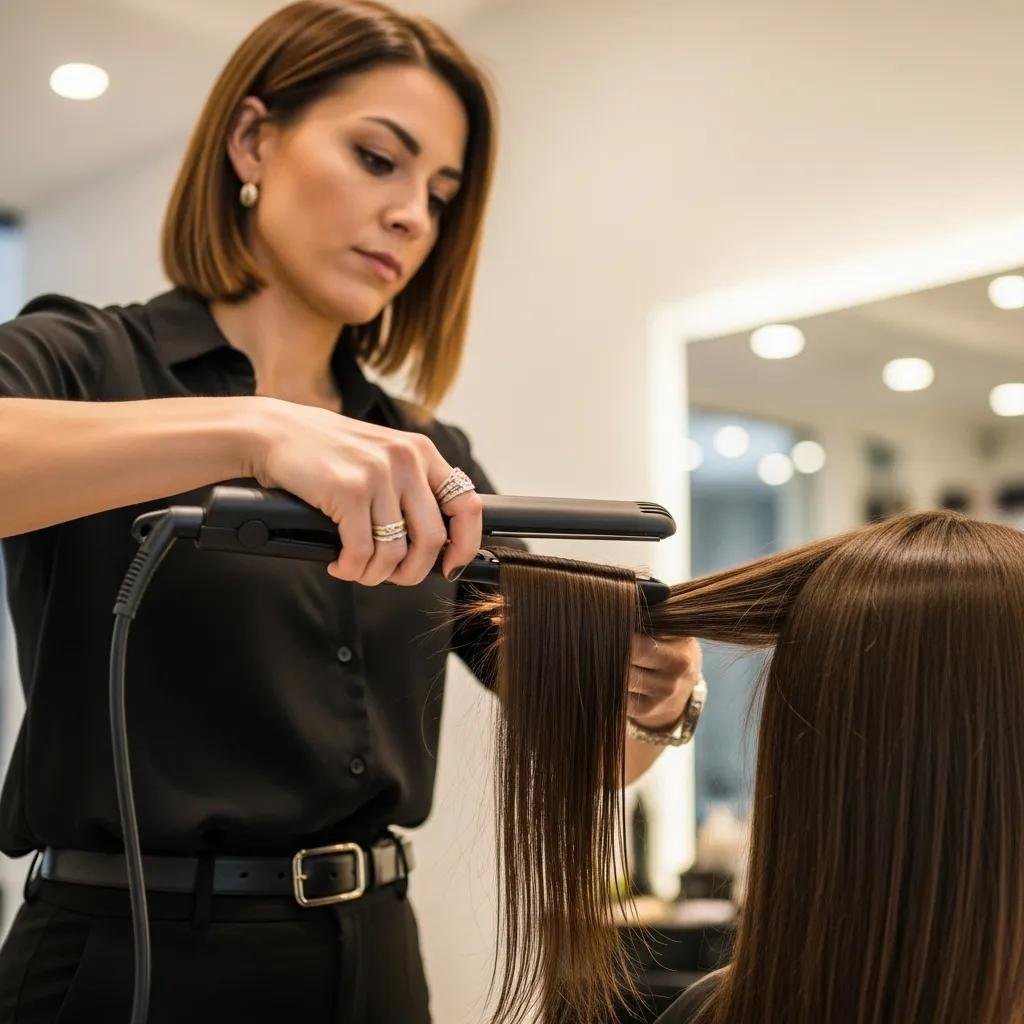
What are expert flat iron techniques for sleek hair?
Pro flat iron technique comes down to consistent sectioning, controlled heat, and minimal passes. Divide hair into narrow, even sections and glide the iron at a steady medium pace — too slow risks overexposure, too fast can leave waves. Match plate material to your hair and use conservative temperatures; ceramic or tourmaline plates are great for daily smoothing on fine to medium hair. Finish by sealing the cuticle with a light serum and a blast of cool air from your dryer to lock in shine and tame flyaways.
These micro-techniques improve hold and move naturally into the blow-drying tips that follow.
What blow-drying tips enhance volume and smoothness?
A focused blow-dry pairs root-lift technique with the right brush and attachment. Apply a volumizing mousse or root-lift product to damp hair, then dry roots first with the nozzle angled upward while lifting sections with a round brush. Use higher heat for initial shaping, then switch to lower heat and a cool shot to set each section — this gives hold with less thermal stress. For curly hair, use a diffuser to preserve pattern and reduce frizz; for smoothing, use a concentrator and a large round brush to create tension and shape.
These drying strategies prep hair for finishing tools and help you pick the right brushes for your texture, which we cover next.
Which hair brushes and combs are best for different hair types and styles?
Brushes and combs are your shaping partners — bristle type, shape, and size control tension, detangling force, and the final finish. Choosing the right brush for lift, smoothness, or definition makes styling quicker and reduces breakage, especially when used with the correct dryer or iron. Below are the primary brush types and their main uses so you can select what fits your routine.
Common brush types and quick uses:
- Round brush (vented or ceramic-coated): Creates root lift and sculpts curl during blowouts.
- Paddle brush: Smooths long hair and helps distribute natural oils for a sleek finish.
- Detangling brush: Gently removes knots on wet or dry hair to prevent breakage.
- Boar or mixed bristle brush: Polishes the cuticle for added shine and a refined finish.
Picking the right brush affects technique and the end result. The sections below show how to use each brush and how to care for them.
What are the uses of round, paddle, and detangling brushes?
Round brushes lift at the root and create bend during a blow-dry; diameter controls curl tightness and bristle stiffness controls tension. Paddle brushes are ideal for long, straight looks where surface smoothing and quick detangling matter — their wide surface speeds styling and helps spread products evenly. Detangling brushes use flexible bristles to separate knots without pulling, perfect for wet-combing or sensitive hair; use them before heat styling to reduce breakage. Clean brushes regularly and handle them gently to keep them performing well — the right tool makes pro techniques easier at home.
Next, we’ll match brush choices to different hair textures so you can choose with confidence.
How do you choose brushes for fine, thick, and curly hair?
Fine hair does best with lightweight brushes and soft bristles that reduce tension and breakage while still creating lift — a small-to-medium round brush and a soft paddle brush work well. Thick hair needs sturdy round brushes with a solid core and mixed bristles to control density and smooth during blow-drying; always detangle gently before heat styling. Curly hair benefits from wide-tooth combs and diffusers with finger-like prongs or wide-round tools designed to stretch rather than flatten curls. Match bristle material and brush size to your texture to cut down on mechanical damage and reduce the number of passes needed.
Before turning up the heat, understand how to protect hair — the next section covers preventing heat damage.
How can you protect your hair from heat damage while styling?
Heat protection is a blend of the right products, sensible temperature choices, and styling frequency to prevent cuticle damage and moisture loss. Heat protectants create a thin barrier that reduces direct thermal impact and helps hair keep elasticity. Apply protectant to damp hair before any hot tool to cut cumulative damage from repeated styling. Use the lowest effective temperature, limit daily high-heat sessions, and keep tools clean so heat transfers evenly — these simple habits keep hair healthier and more resilient. Below are quick, practical best practices you can follow every time.
To prevent heat damage, follow these best practices:
- Always apply a dedicated heat protectant to damp hair before using heat.
- Set tools to temperature ranges appropriate for your hair type (lower for fine/damaged, higher for thick/coarse).
- Limit high-heat styling to a few times per week and give hair rest days to recover.
These routines lower cumulative harm and help styles last longer. The next subsections explain why protectants work and how to maintain both tools and hair.
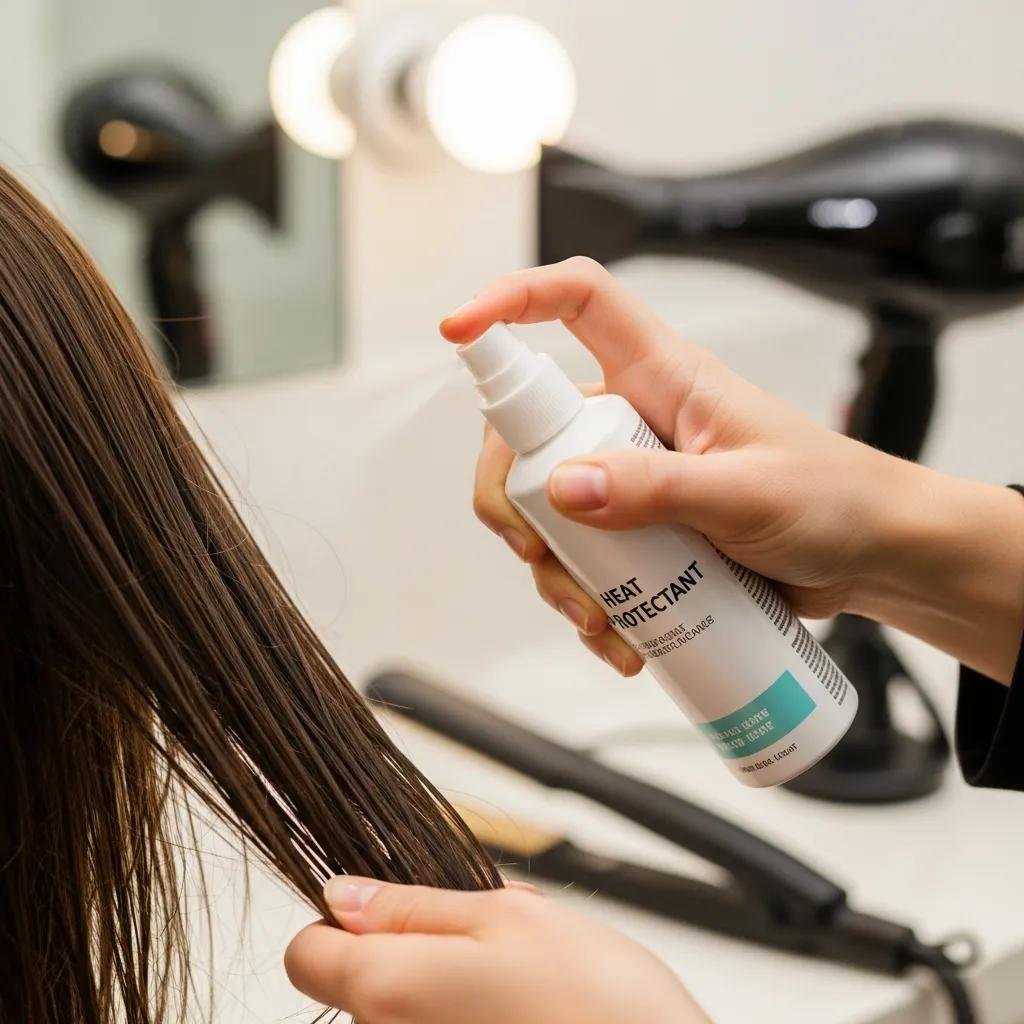
Why is heat protectant essential for healthy hair?
Heat protectants coat the hair shaft with polymers or light silicones that reduce moisture loss and act as a buffer between hot tools and the cuticle. Conditioning polymers help redistribute heat and improve glide, while some formulas include humectants to lock in moisture; applying while hair is damp ensures even coverage. Use a measured spray or cream from roots to ends and comb through for full distribution before drying or styling. Making a protectant part of every heat session is a simple step that preserves texture, reduces split ends, and supports long-term hair health.
Combined with safe-styling habits, chemical protection goes a long way toward preventing damage — see the tips below.
What are the best practices for safe heat styling?
Safe heat styling follows clear temperature guidelines, regular tool maintenance, and recovery strategies. Use lower temperatures (250–320°F) for fine or chemically treated hair and higher, controlled temperatures (350–450°F) for thick or coarse hair, always testing on a small section first. Keep tools clean — wipe product buildup from plates and clear dryer vents — to ensure even heat, and replace worn parts when performance drops. If hair shows excess porosity, breakage, or brittleness, reduce heat frequency and consult a professional about restorative treatments before returning to regular styling.
With these protections in mind, choose tools that suit your hair type — the following section helps map those choices.
How do you choose the right hair styling tools based on your hair type?
Your hair’s density, texture, and condition determine the best tools because material, heat range, and design interact with hair structure. Fine or damaged hair responds best to gentler tools and soft brushes to avoid breakage, while dense hair benefits from high-heat-capable irons and powerful dryers for efficient styling. The table below maps tool recommendations and settings by hair type so you can make informed purchases. After the table, use the short checklist to finalize your decision.
Use this table to narrow purchases so each tool serves your routine well. The checklist below helps you decide in three quick steps.
- Assess hair density and current damage before choosing tools.
- Choose tool materials that match your hair’s moisture and porosity profile.
- Start at lower temperatures and raise only if the style requires it.
These rules cut down on unnecessary spending and help protect hair — when home care isn’t enough, consider a professional service for targeted repair.
Which tools work best for fine and damaged hair?
Fine or damaged hair needs tools that limit mechanical stress and avoid repeated high-heat exposure. Favor ceramic or tourmaline plates for even heat distribution so you can style at lower temperatures. Use smaller brushes with softer bristles for gentle detangling and a lightweight dryer with variable heat to prevent over-drying. Minimize passes with a flat iron and always use a heat protectant; schedule occasional restorative salon services when needed to rebuild strength. These conservative choices help you keep length and shine while still achieving polished styles.
Below we contrast those recommendations with the higher-performance tools suited to dense textures.
What styling tools are ideal for thick and curly hair?
Thick and curly hair benefits from powerful, efficient tools that move through dense sections, like titanium flat irons with precise temperature controls and high-wattage dryers with concentrators. Larger-barrel curling wands and mixed-bristle round brushes help create tension across thicker fibers and shape styles without extra passes. Work in smaller, uniform sections for even heat exposure and faster styling; pair heavy-duty tools with protective products to preserve elasticity. These choices cut styling time and deliver consistent results when combined with the right technique.
Choosing the right tools improves at-home results, and a local salon visit can accelerate learning — read on to learn why Kylie Studio Salon can help.
Why choose Kylie Studio Salon for expert styling and personalized tool advice?
Kylie Studio Salon pairs one-on-one consultations with hands-on services to translate pro tool know-how into routines you can repeat at home. As a Bethesda salon and information hub, we focus on individualized recommendations, stylist-led instruction, and salon services — from precision cuts and blowouts to smoothing treatments — that complement your tool choices. Many clients book a styling session with Ruth for a live demo of flat-iron and curling techniques plus tailored product suggestions. For local convenience, appointments are available by phone at our Bethesda studio.
What makes Kylie Studio Salon’s styling services unique in Bethesda?
We emphasize education and personalization: each consultation considers your hair history, lifestyle, and goals so we recommend tools and settings you’ll actually use. Our services are designed to teach technique as well as deliver a finished style — from blowouts and keratin treatments to customized styling sessions. The local, attentive approach and opportunity to learn directly from a stylist turn a single visit into lasting styling confidence. You’ll leave with a clear plan for tools, temperatures, and maintenance tailored to your hair.
How do I book a professional styling appointment with Ruth?
Booking a styling consultation is simple. Call Kylie Studio Salon to schedule, bring reference photos and a brief history of any recent chemical services, and be ready to share your daily styling routine so the stylist can recommend the best tools and products. Appointments include a consultation to define goals, a hands-on demo when requested, and clear take-home guidance so you can recreate the look. For Bethesda clients, an in-person visit gives the best combination of demonstration, product selection, and professional finishing.
Frequently Asked Questions
1. How often should I replace my hair styling tools?
Replace tools based on condition and how often you use them. A good rule is to consider replacing flat irons and dryers every 2–3 years, especially if you notice uneven heating, frayed cords, or inconsistent performance. Regular cleaning and basic upkeep can extend a tool’s life, but daily users should inspect tools more often for wear that could affect results or harm hair.
2. Can I use heat styling tools on wet hair?
It’s not recommended to use most heat styling tools on wet hair — wet hair is weaker and more prone to breakage, and steam can cause damage or frizz. Always towel-dry thoroughly and apply a heat protectant before using tools like flat irons or wands. If a tool is explicitly designed for damp-to-dry use, follow the manufacturer’s instructions.
3. What is the best way to clean my hair styling tools?
Cleaning extends tool life and ensures even heat. For flat irons and curling wands, unplug and cool fully, then wipe plates or barrels with a damp cloth or cotton pad and a little rubbing alcohol to remove buildup. For hair dryers, remove and clean the filter regularly with a soft brush or cloth to clear lint and dust. Clean tools heat more evenly and help prevent damage to hair.
4. How can I achieve a professional blowout at home?
Start with clean, towel-dried hair and apply a heat protectant and a volumizing product. Use a quality dryer with a concentrator and a round brush. Dry roots first with focused airflow, then wrap sections around the brush while drying to create tension and smoothness. Finish with a cool shot to set the style and a lightweight serum for shine. Practice sectioning and brush tension for the best results.
5. What are the benefits of using a diffuser for curly hair?
A diffuser helps curly hair dry more evenly while preserving the natural curl pattern and reducing frizz. By dispersing airflow, a diffuser minimizes direct heat and lets curls form without being flattened. To use it, scrunch curls gently while drying, and avoid over-manipulating them to keep definition and bounce.
6. Are there specific tools for styling bangs?
Yes — bangs often need a smaller toolkit. A small round brush is great for shaping and volume, while a flat iron can give a sleek finish. For textured bangs, a small curling wand adds soft movement. A fine-tooth comb helps with precise sectioning, and a heat protectant is essential to prevent damage.
7. How do I choose the right heat protectant for my hair type?
Pick a protectant that suits your texture and styling routine. Fine or damaged hair usually does best with lightweight sprays that add protection without weight. Thick or coarse hair can benefit from cream-based protectants that offer hydration and stronger protection. Curly hair may prefer products with curl-friendly ingredients. Always apply evenly to damp hair before styling for best coverage.
Conclusion
The right tools and the right habits can make at-home styling feel simple and deliver salon-worthy results. Understanding what each tool does, how materials and temperatures affect hair, and how to protect your strands will help you work smarter — not harder. If you want personalized recommendations or hands-on coaching, book a consultation at Kylie Studio Salon. Let us help you find the tools and techniques that fit your hair and your life.


